
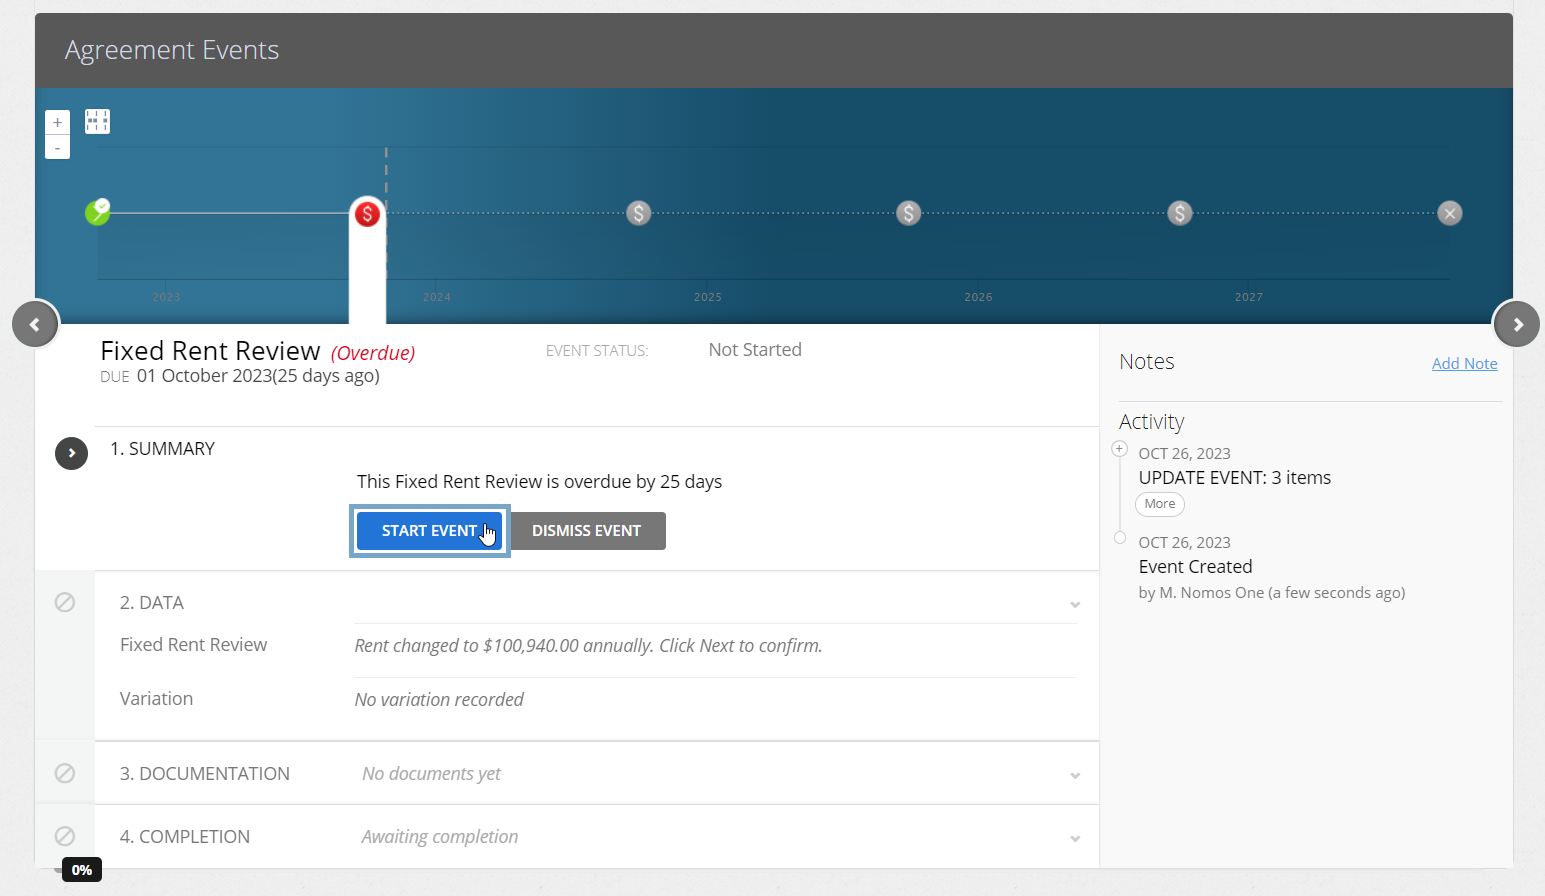
In this article we're guiding you through the steps of completing a Fixed Rent Review on the Agreement Timeline.
- Click on the Fixed Rent Review icon on the Agreement Timeline, and click Start Event.
Is your Fixed Rent Review Event in a locked period? You'll need to ask a user with the Administrator permission in your Organisation to edit the Lock Date before you complete the Event. Check out this article for more information.
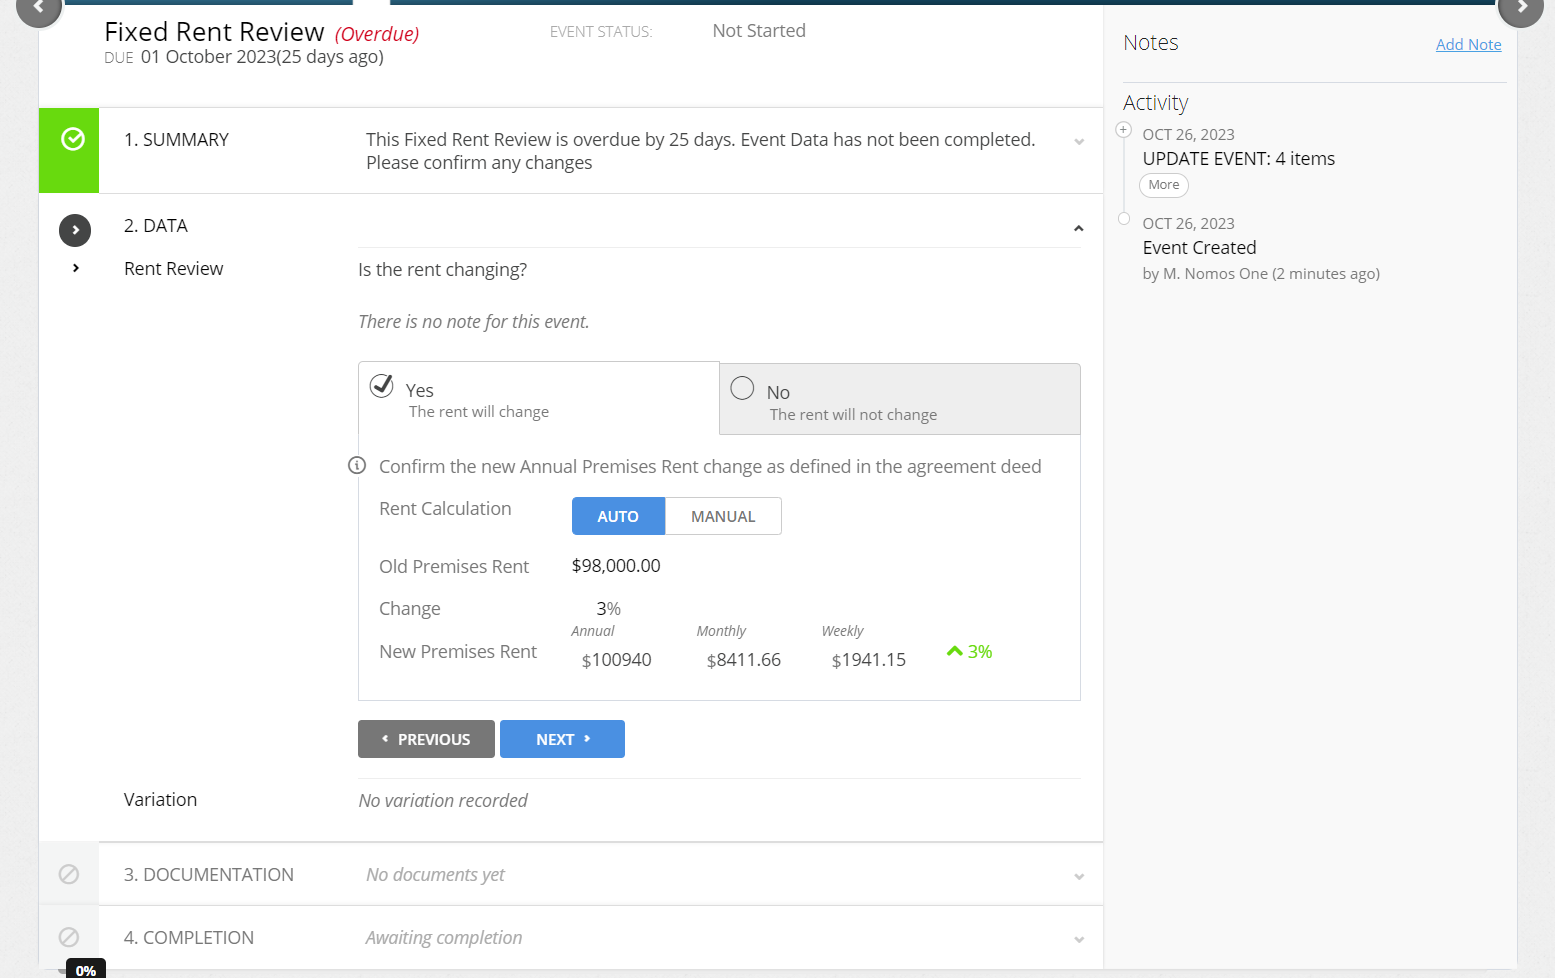
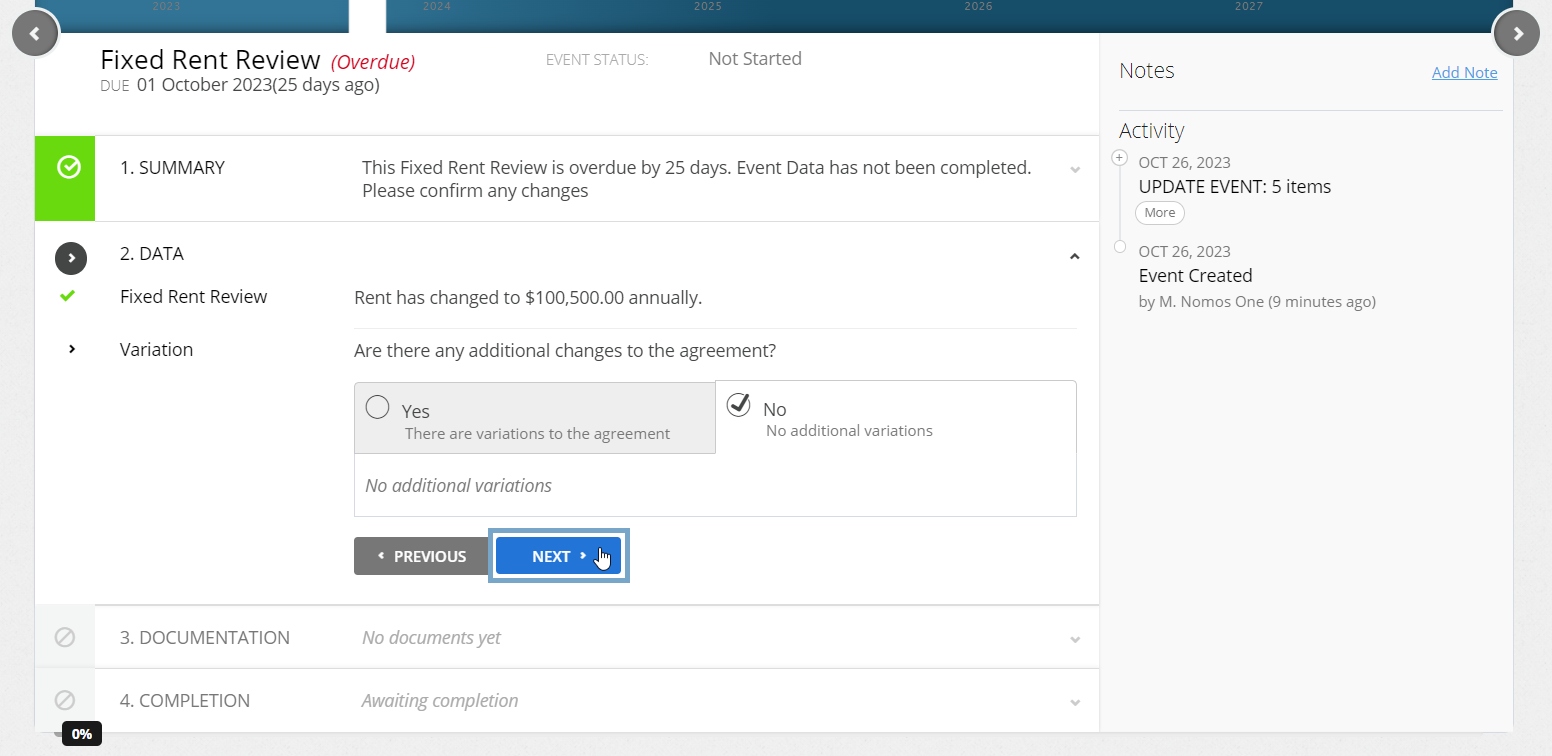
- At Step 2, if the rent is changing, select “Yes the rent will change”. If the rent is not changing, select “No the rent will not change”.
If you select “No the rent will not change”, you'll see a remeasurement entry in your IFRS 16 Journals on the event date, if the rent was scheduled to increase/decrease on this rent review date.
- If the rent is changing based on the scheduled increase/decrease, use the “auto” option. If the rent is changing, but the change is not the same as the scheduled increase/decrease, use the “manual” option, and record the new rent amount.
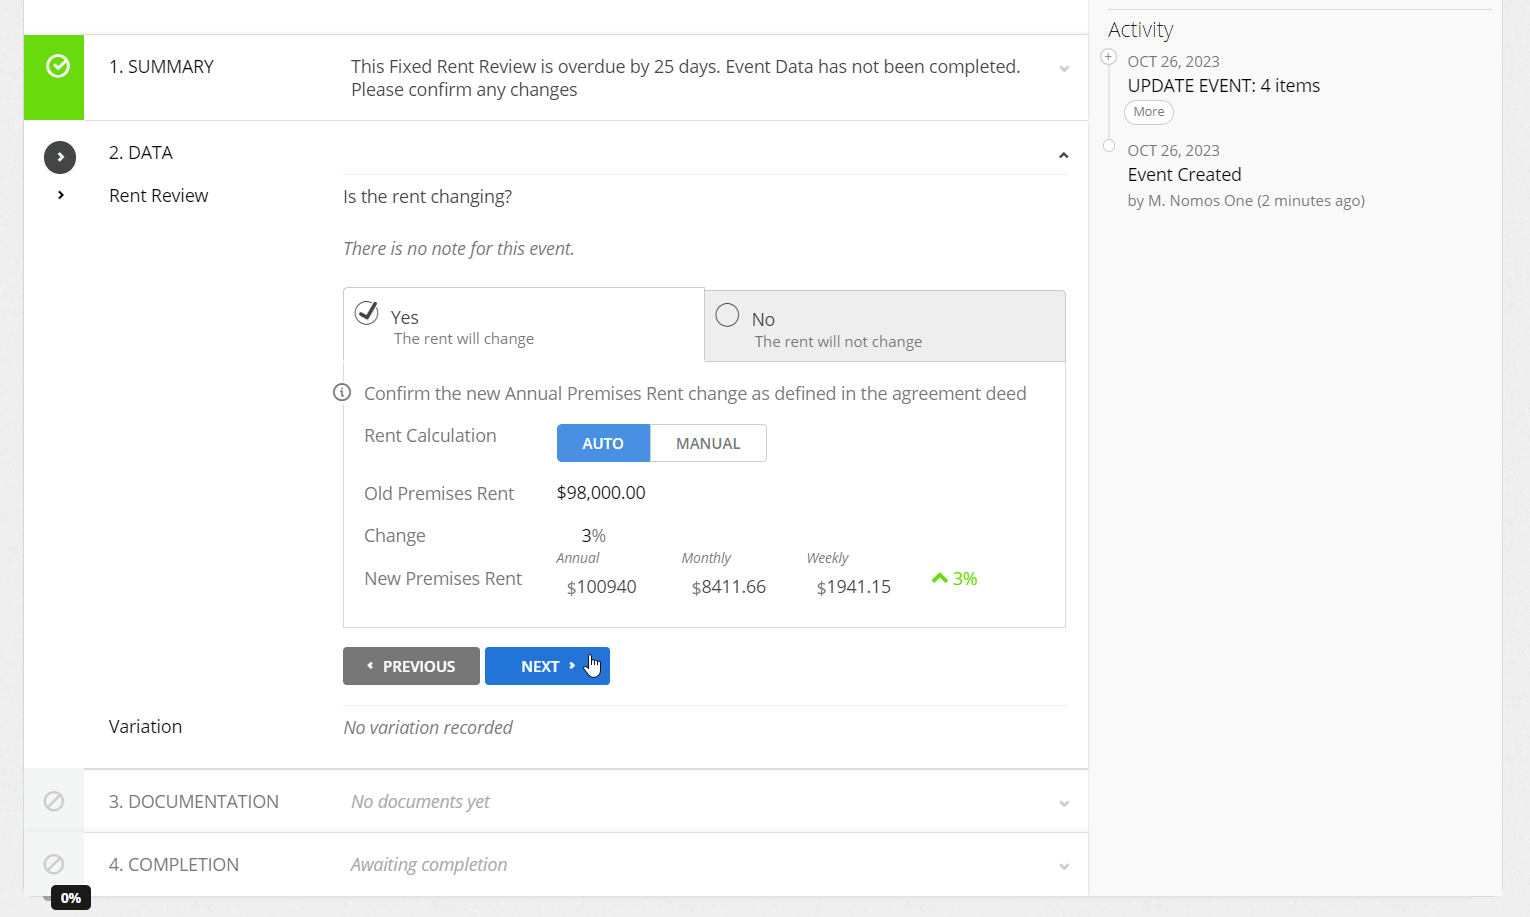
The Auto option will display an increase or decrease in Rent according to what was agreed in your contract, and recorded against Fixed Rent Review Event when it was created in the Agreement Wizard. Using this option, you won't see a remeasurement entry on your Journals, as the rent adjustment was known from Commencement and already factored in to your Lease Liability and Right of Use Asset calculations.
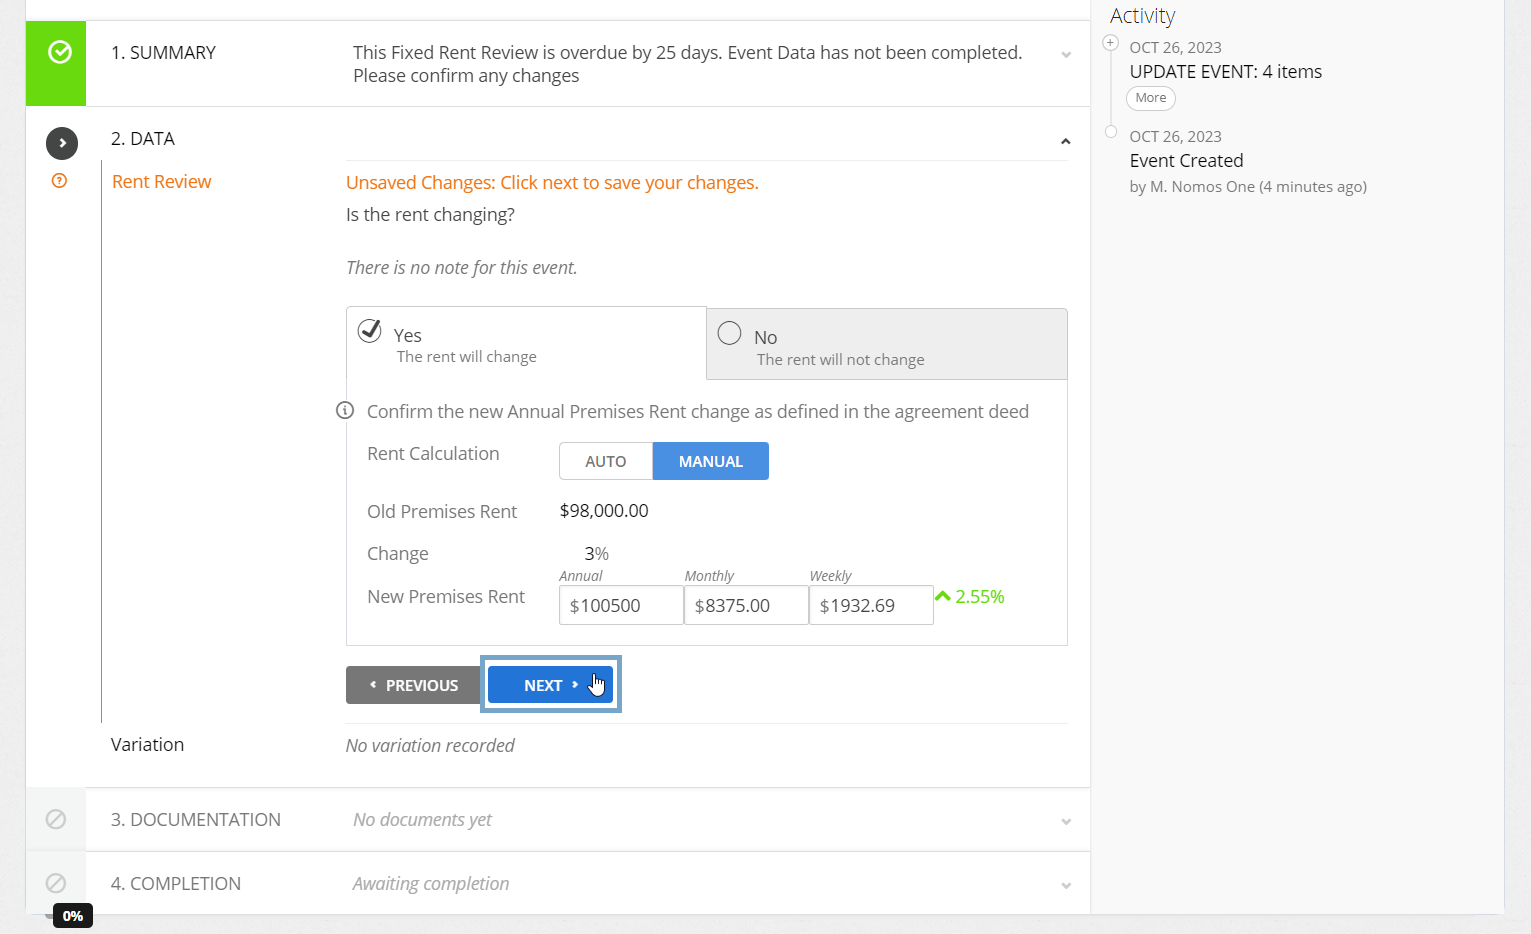
The Manual option allows you to record a change in rent different from the change agreed in the initial contract. Using this option, you'll see a remeasurement entry in your Journals for an increase or decrease in Lease Liability, as the rent adjustment is different to the original contracted change.
- If there are any additional changes to the contractual data of your Agreement which take effect from the Event Date, click Yes there are variations to the Agreement and record this. If there are no other changes occurring, click No additional Variations then click Next.
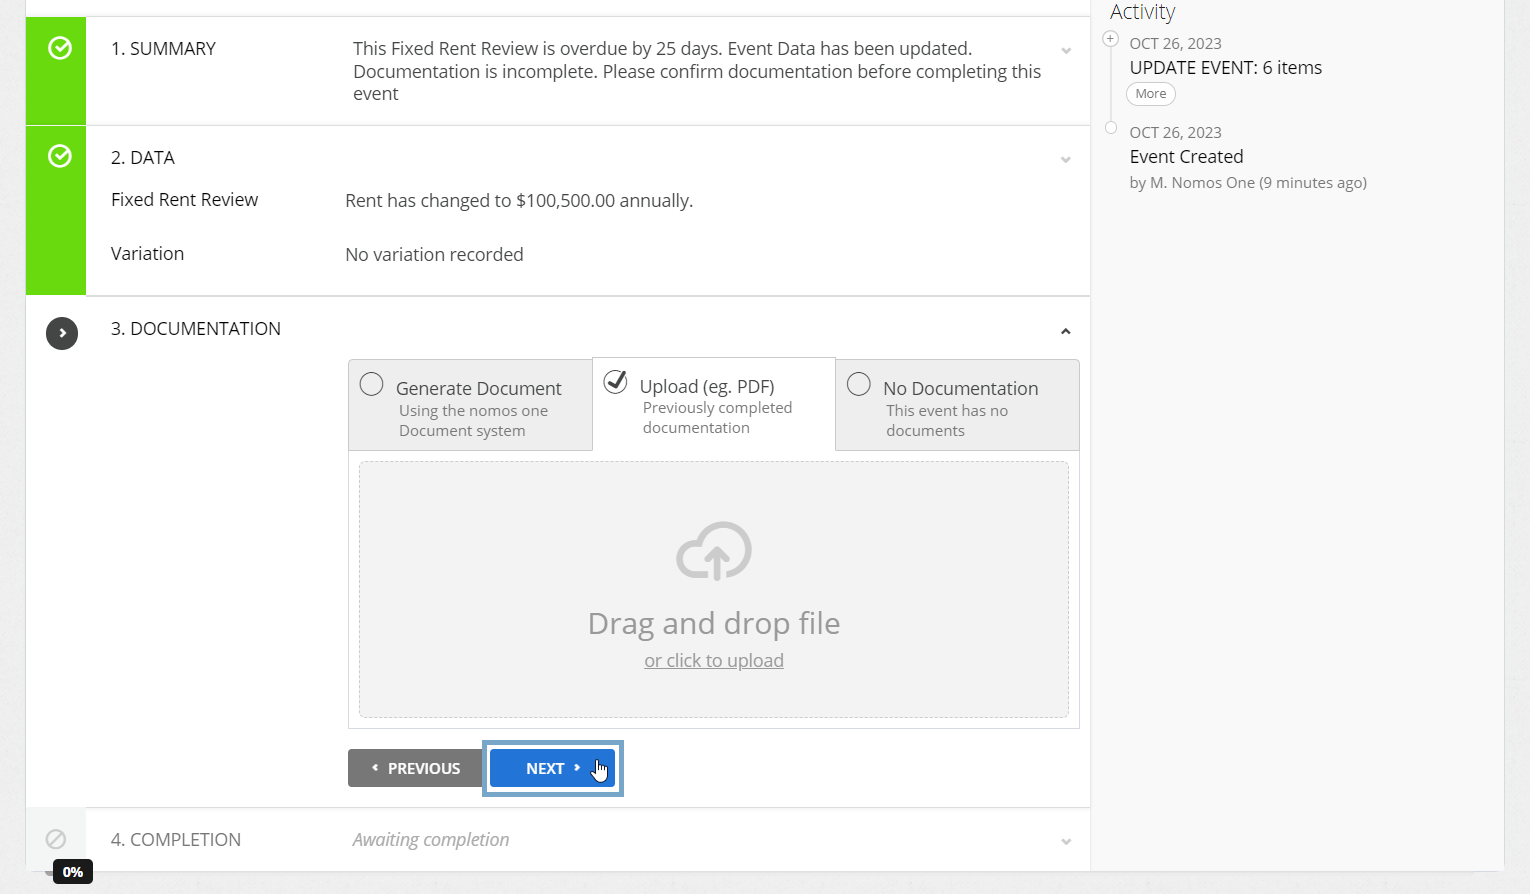
- Upload any supporting Documentation, or select No Documentation and click Next.
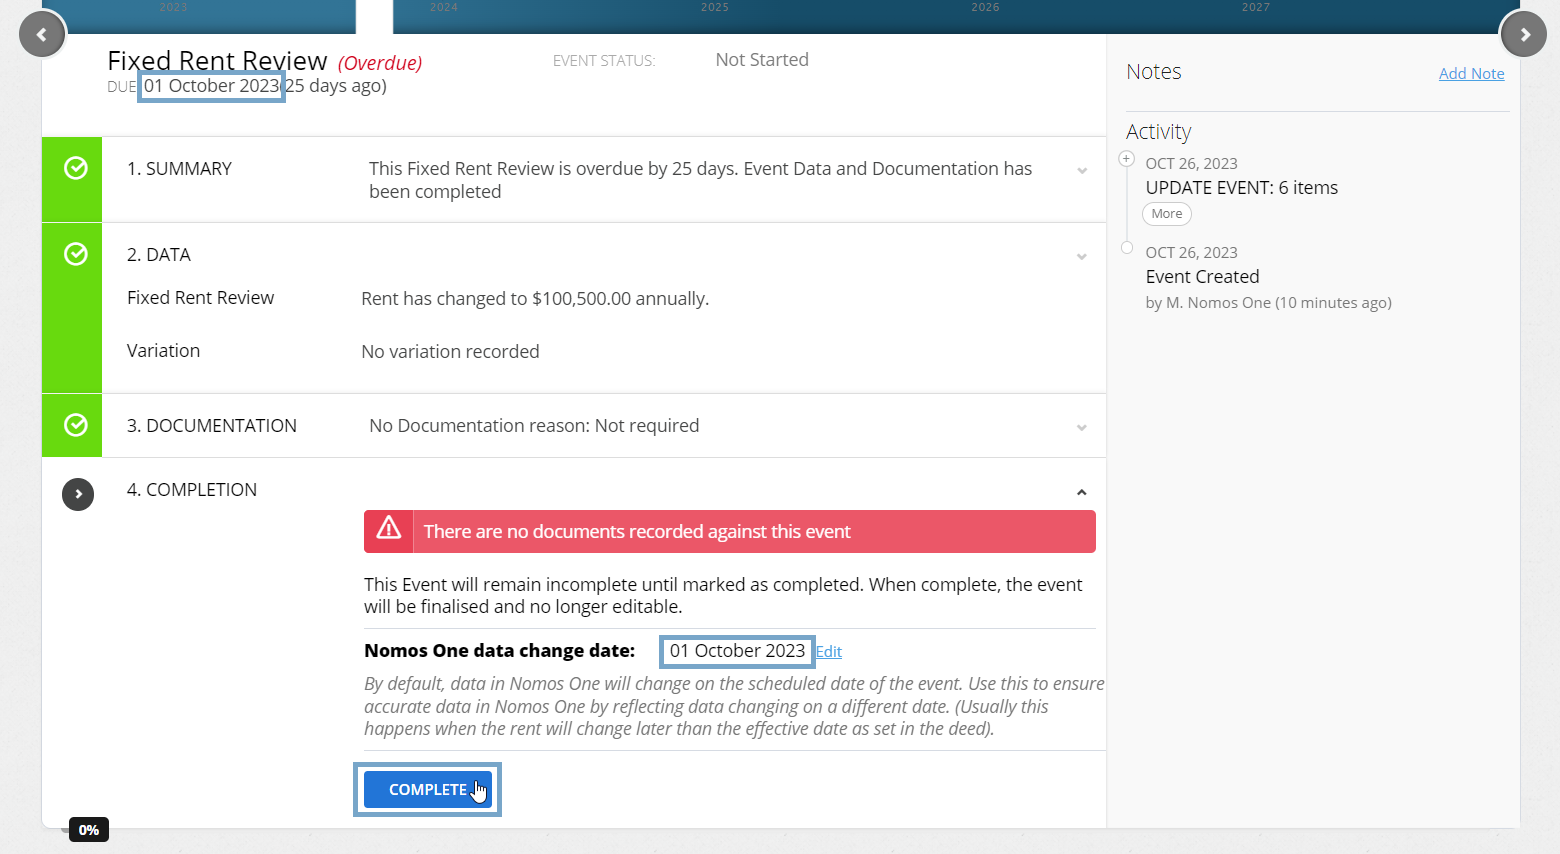
- Confirm the Data Change Date of the Event and click Complete. This should match the Event Date. If these don't match, click Edit to select the correct date before going on to click Complete.
You'll see a certification that you're Done, and the event icon on the Agreement Timeline will turn green to let you know you're finished!
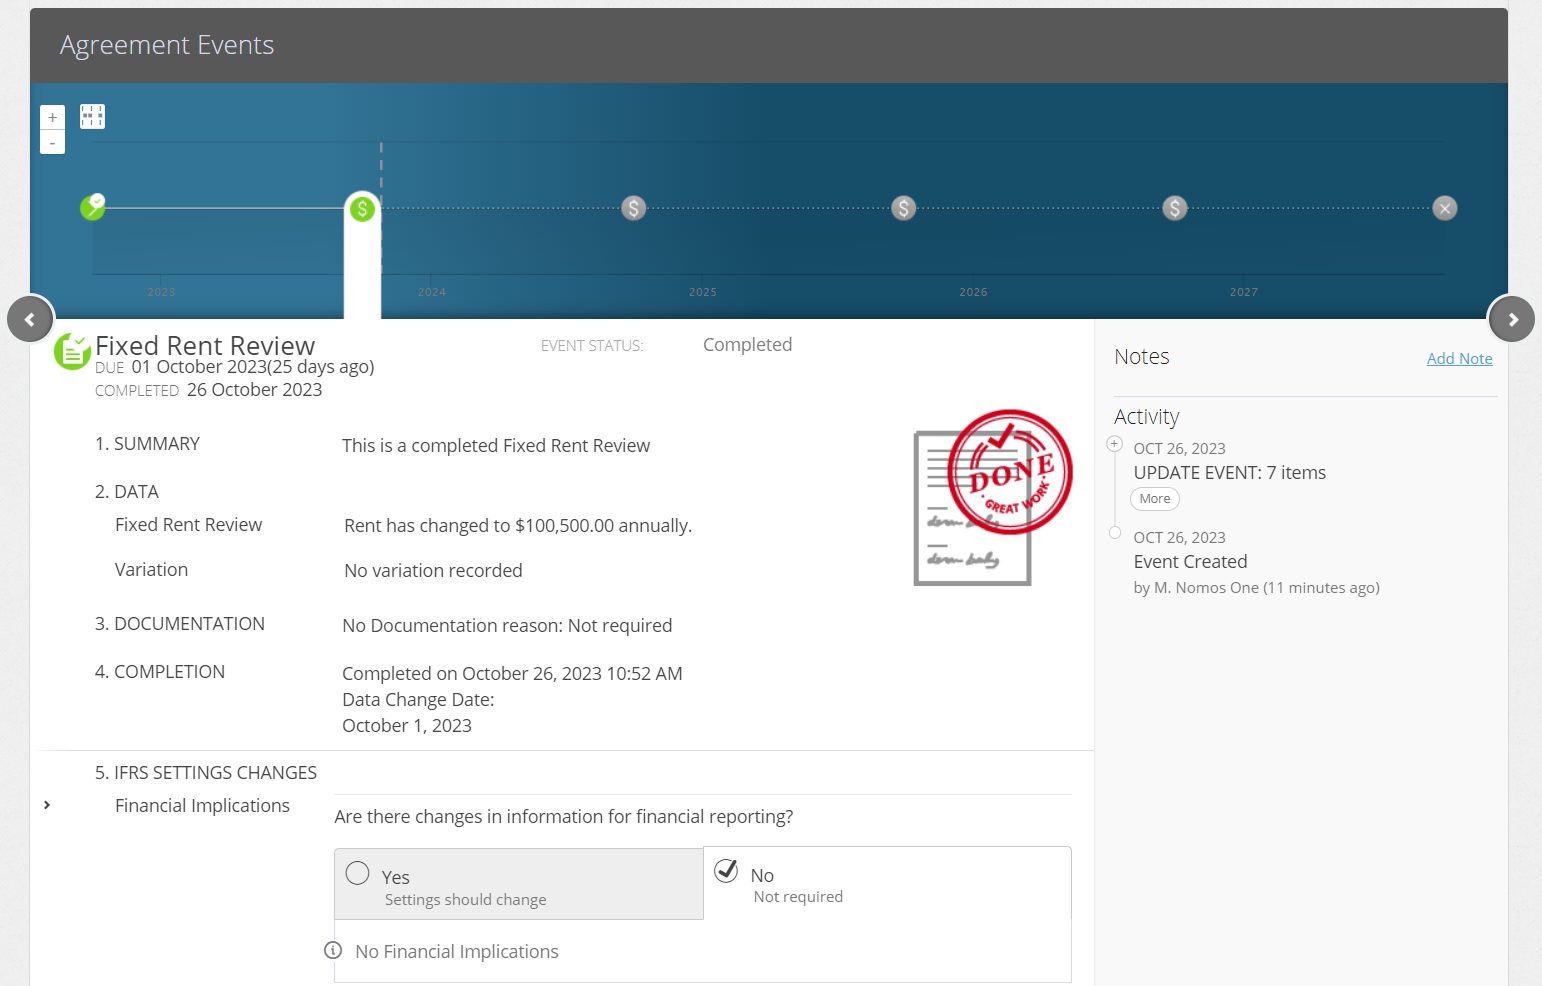
Make sure you refresh your page to ensure the Agreement Header displays the updated rent.
Please Note: If there is a Rent Review on an Agreement that doesn’t line up with the Rent Payment Date, there will be a pro-rata rent amount recorded on the following Payment Date. This is to represent the additional rent that would have been paid between the Rent Review Date and the next Payment Date. Payment Dates following the first payment date after the Rent Review will then show the updated Rent amount.
Nomos One does not provide or purport to provide any accounting, financial, tax, legal or any professional advice, nor does Nomos One purport to offer a financial product or service. Nomos One is not responsible or liable for any claim, loss, damage, costs or expenses resulting from your use of or reliance on these resource materials. It is your responsibility to obtain accounting, financial, legal and taxation advice to ensure your use of the Nomos One system meets your individual requirements.