
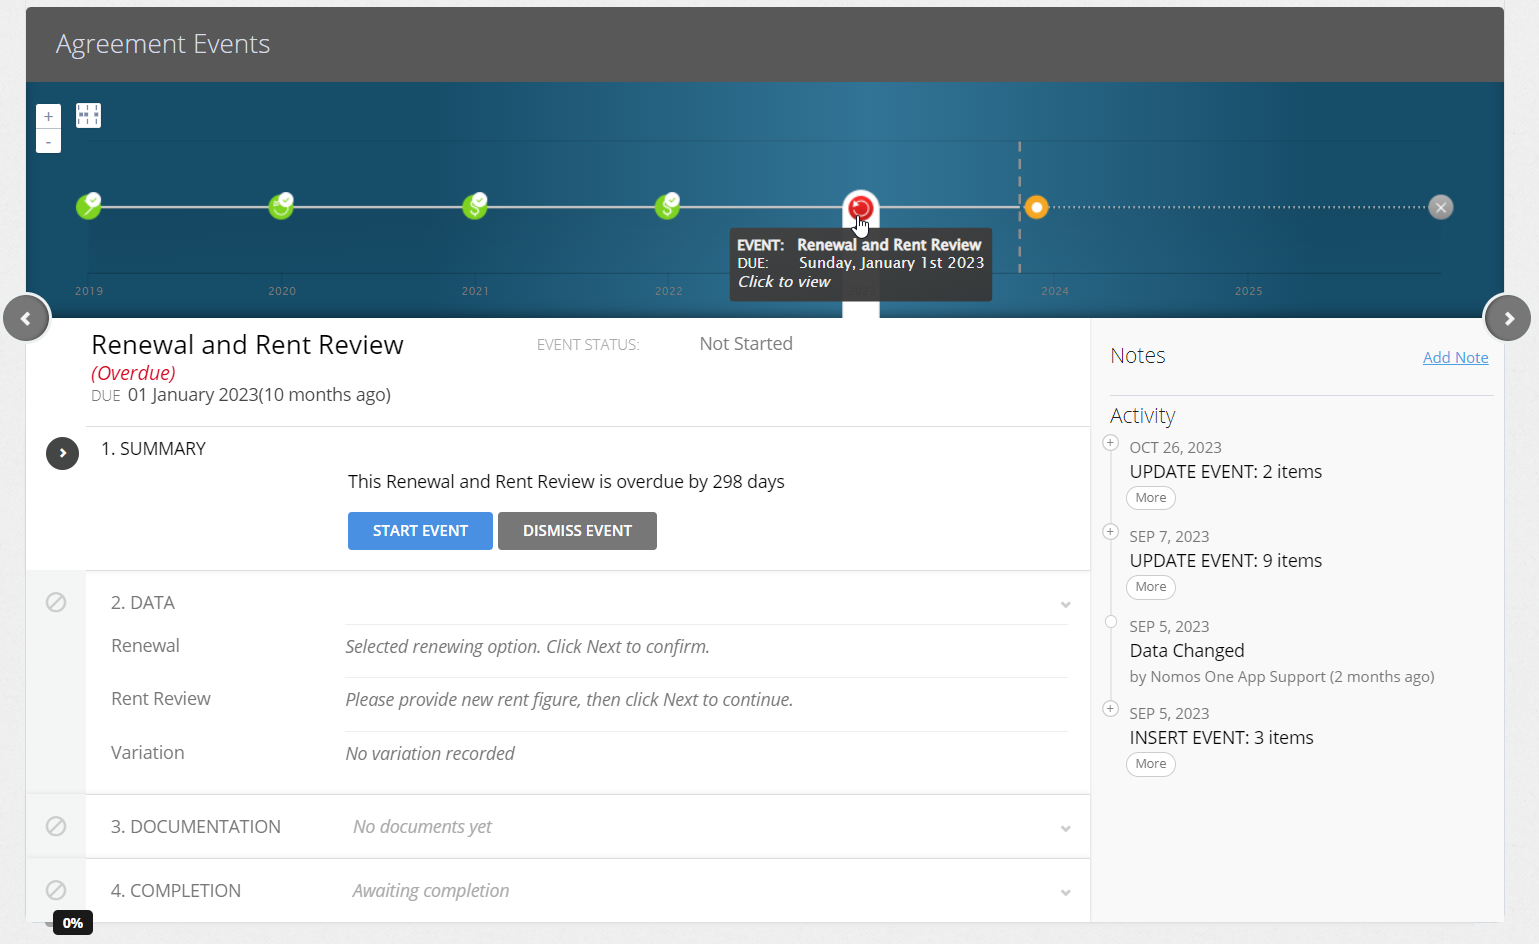
Every Event you create in the Agreement Creation Process will have a corresponding icon on the Agreement Timeline. You'll use the Event on the Timeline to update your Agreement data from the scheduled due date forward, preserving all of your historic data up until that moment. Any change you process will apply prospectively until you change it again through a later Event.
If two Events are scheduled for the same date, i.e., a Renewal and a Rent Review, these Events will automatically merge to be one icon on the Agreement Timeline so you can update these together.
The progress you make through the Event completion process will save between your Nomos One login sessions, so you can pick up where you left off if you don't quite finish completing the Event in one session.
Completing Events on the Agreement Timeline
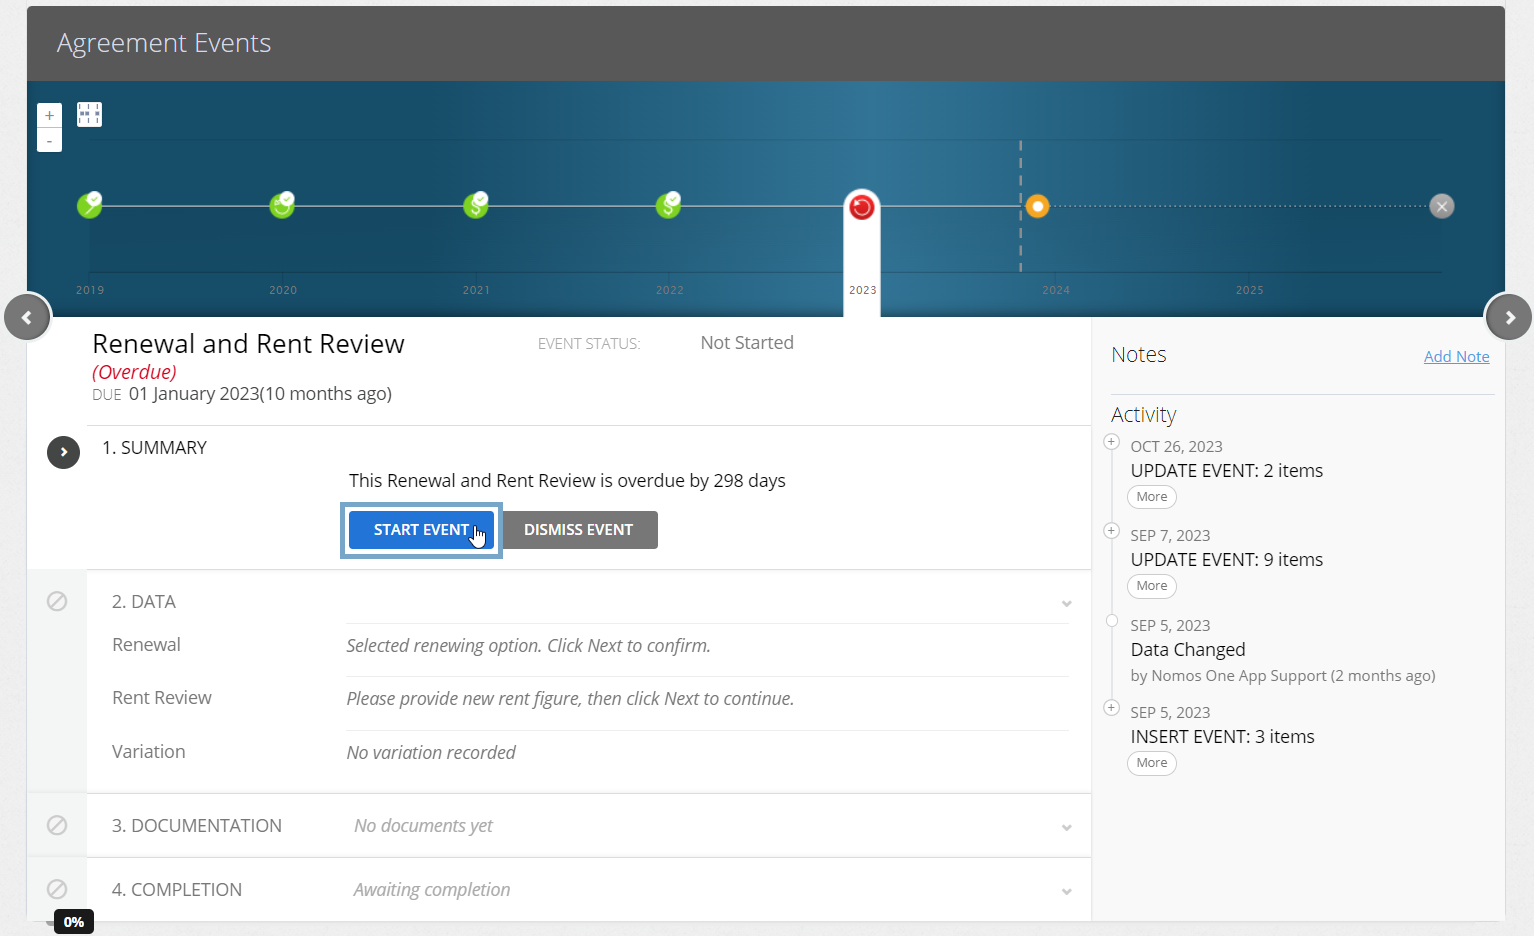
Completing any Event on the Agreement Timeline is a four step process.
Please note: Events should be completed on the Agreement Timeline in chronological order as they pass in time. Completing Events out of order can interfere with expected reporting results under IFRS 16.
Additionally, Events should generally not be completed until they are due, or near when they are due, even if you have information about the Event now. For example, if the date today is June 1st 2025, you should not complete a rent review dated on March 1st 2026. That is because the Event is still a while away, and the information you currently have about the Event may change before the scheduled date. Please only complete Events once you are 100% certain that the information you have about it is correct and will not change.
- On the Agreement Timeline, click onto the icon of the Event you want to complete.
- At step 1, click “Start Event”.
Are any of your Events in a locked period? You'll need to ask a user with the Administrator permission in your Organisation to edit the Lock Date before you complete the Event. Check out this article for more information.
- Step 2 is where you can update your Agreement data. The steps and selection options here depend on the type of the Event you're completing. Follow the on screen prompts to update your Agreement, then click “Next” to continue.
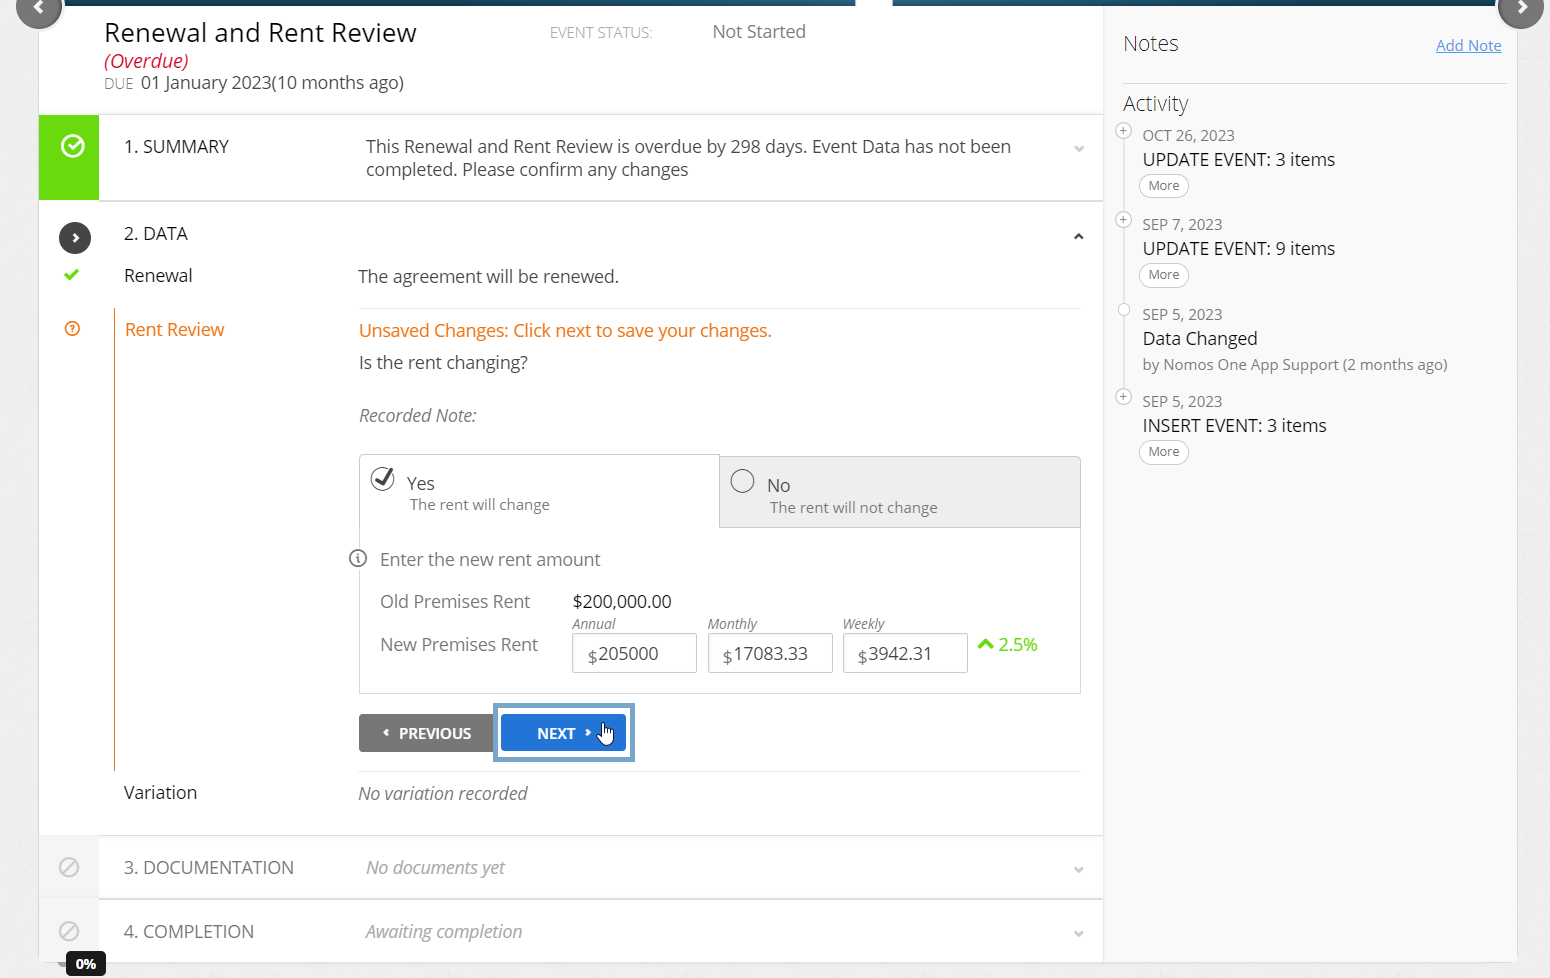
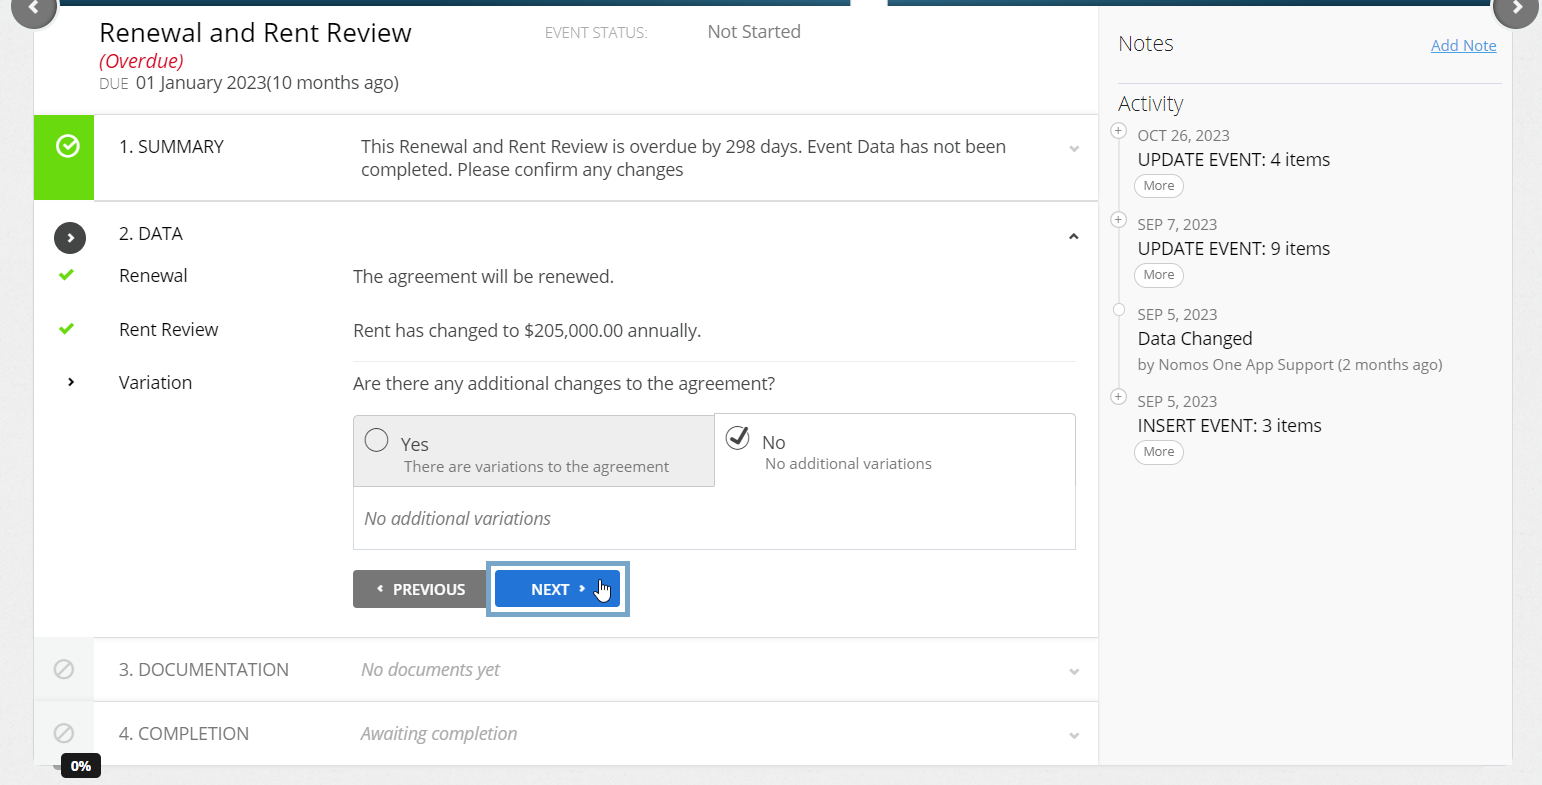
- Within step 2, you'll be asked if there are any additional changes to your Agreement (i.e. a Variation that changes your Agreement, additional to the change you processed in the step above). You can select “Yes” (and complete any changes), or “No”, then click “Next” to continue.
- At step 3 you can attach any Documentation that relates to your Event. You can either upload your own document, or select “No Documentation” then choose a reason for not having documentation. Whichever you choose, click “Next” when you're done to proceed to the final step.
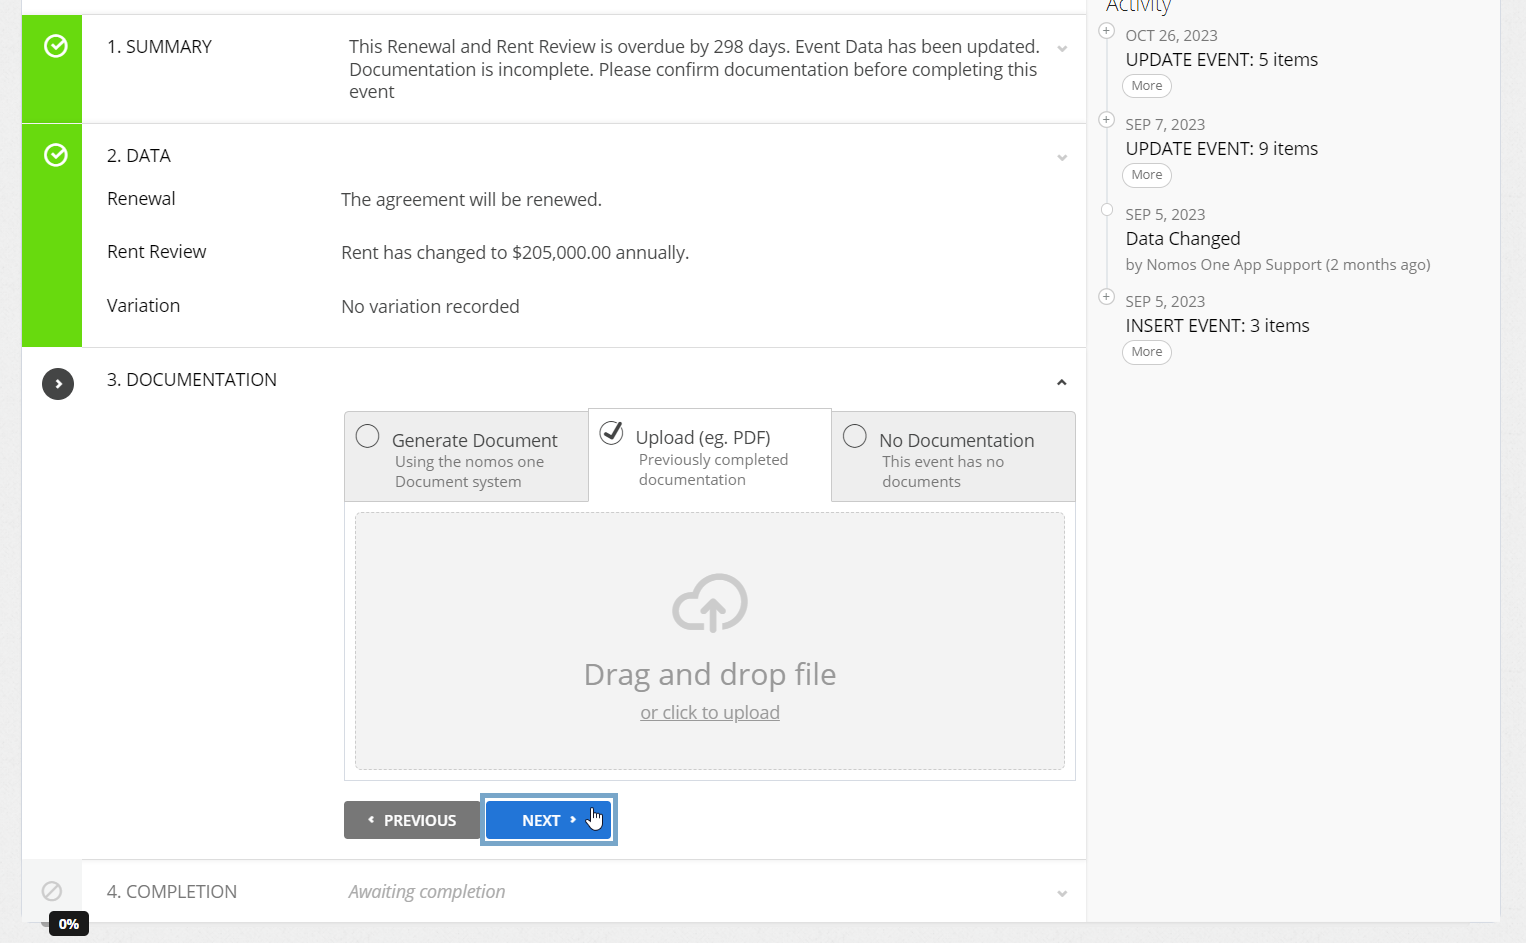
- At step 4, click “Complete”. The “data change date” is a legacy feature, and will not have an impact if used.

The Event icon on the Agreement Timeline will turn green and you'll see a certification which lets you know the Event has been completed. The changes you've made will be summarised under the timeline and in the Activity log located in the panel on the right.
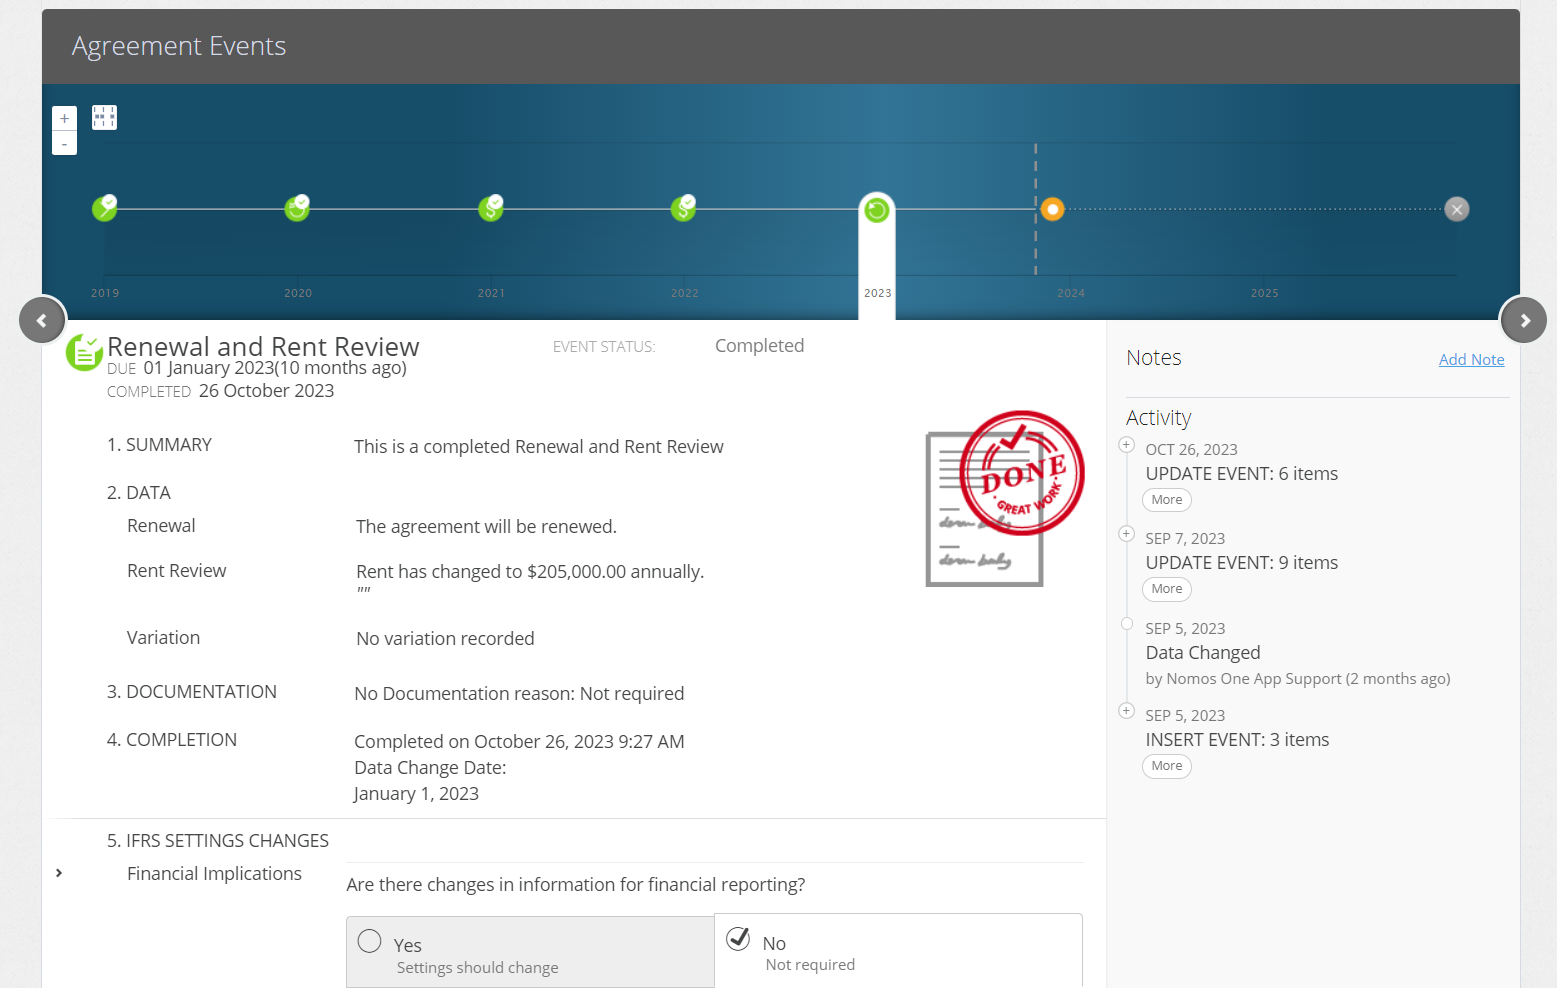
Make sure you refresh your page in your browser to ensure that the changes you've processed in your Event display in the header of the Agreement Overview.
Nomos One does not provide or purport to provide any accounting, financial, tax, legal or any professional advice, nor does Nomos One purport to offer a financial product or service. Nomos One is not responsible or liable for any claim, loss, damage, costs or expenses resulting from your use of or reliance on these resource materials. It is your responsibility to obtain accounting, financial, legal and taxation advice to ensure your use of the Nomos One system meets your individual requirements.