
Completing Events in Nomos One is an important step in ensuring your Agreement and IFRS 16 Financial Reports display the most current contractual and financial data relating to your Agreement when it has changed after the Commencement of your Agreement. The Nomos One Event Approval functionality allows you to monitor and approve Event changes by providing approval rights to specified users.
In this article, we're showing you how to enable the Event Approval functionality in your Organisation, and how you can cater it to meet your needs.
What are Event Approvals?
Users with Administrator permissions can enable Event Approvals in an Organisations to add an extra level of security to their Agreement data.
Please Note: Enabling Event Approvals doesn't prevent users from editing Commencement level data through the Repair Data workflow, so you'll need to ensure your team knows the correct process of updating Agreement data throughout its lifetime.
Enabling Event Approvals in your Organisation will add an additional step to the Event Completion process, where by the on-boarder will require approval from another user in the system before they can save the changes they have made to an Agreement through an Event. An email notification will be sent to a user set as an approver who can click on a direct link and immediately take action!
How to turn on Event Approvals in your Organisation
Setting up Event Approvals in your Organisation only takes a few steps:
- Navigate to the Settings Console and click on the Event Approvals tab
- Toggle the bar that corresponds with the heading Enable Event Approvals for this Organisation to read Yes
- If you'd like to customise your Event Approvals, review the Options section which displays once Enable Event Approvals have been enabled. There are three customisation options:
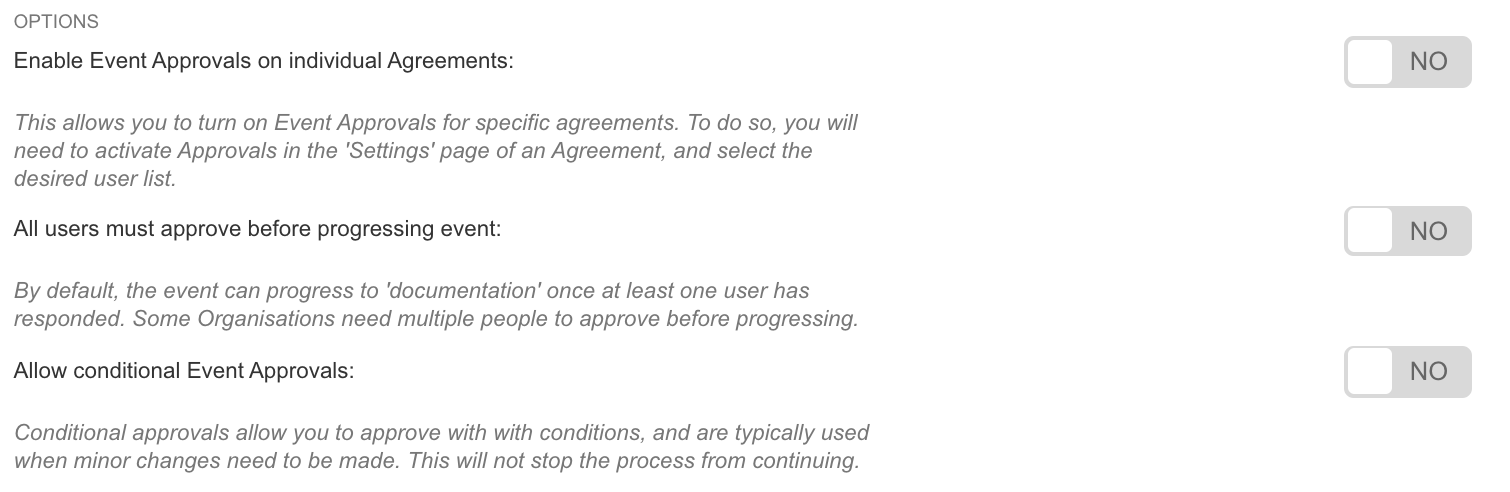
Enable Event Approvals on individual Agreements
By default, Event Approvals apply to all Agreements in an Organisation and use the default Approver list. If you'd like the ability to switch on or off Approvals for specific Agreements, or use another Approver list, rather than your default list, you can toggle this bar to Yes. Check out our guidance here on how to enable Event Approvals on individual Agreements.
All users must approve before progressing
If you switch this Option to Yes, if there is more than one user who is an approver in an Approval List it will require all users in
the Approver list to approve the Event change before it can be completed, rather than just one user's approval being sufficient to complete the Event.
Allow conditional Event Approvals
Conditional Event Approvals can be enabled, so that if an Approver is happy for an Event to be approved on the basis that a certain condition is met, they can provide that detail, and approve the Event. We recommend only using this if the change required is minor.
- Next, select the Review Method you'd like to apply to your approvals
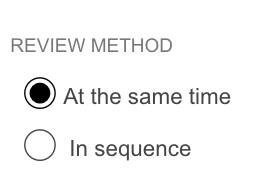
At the same time means that if there are multiple Approvers, they will all receive the approval email at the same time, and can approve it in any order:
In sequence means Approvers will receive the approval email in an order chosen by your organisation, and will need to approve the Event change in that sequence before the Event can be completed: 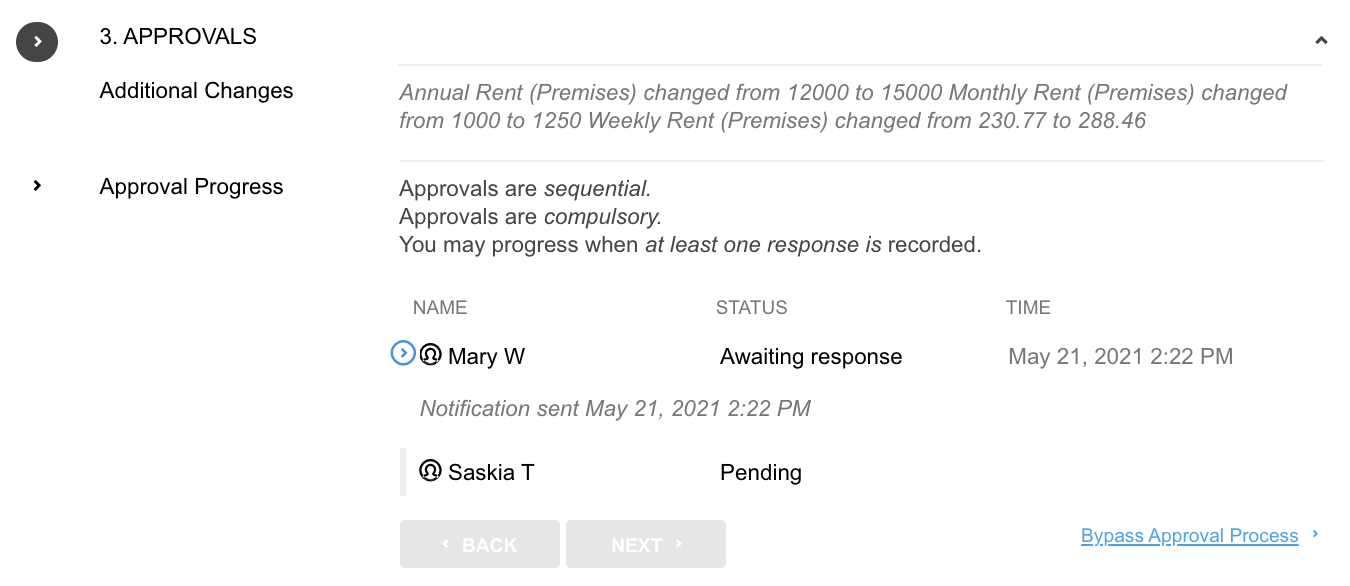
With both Review Methods, unless the "All users must approve before progressing" option is selected, the Event will be able to be completed after at least one Approver has approved the Event change.
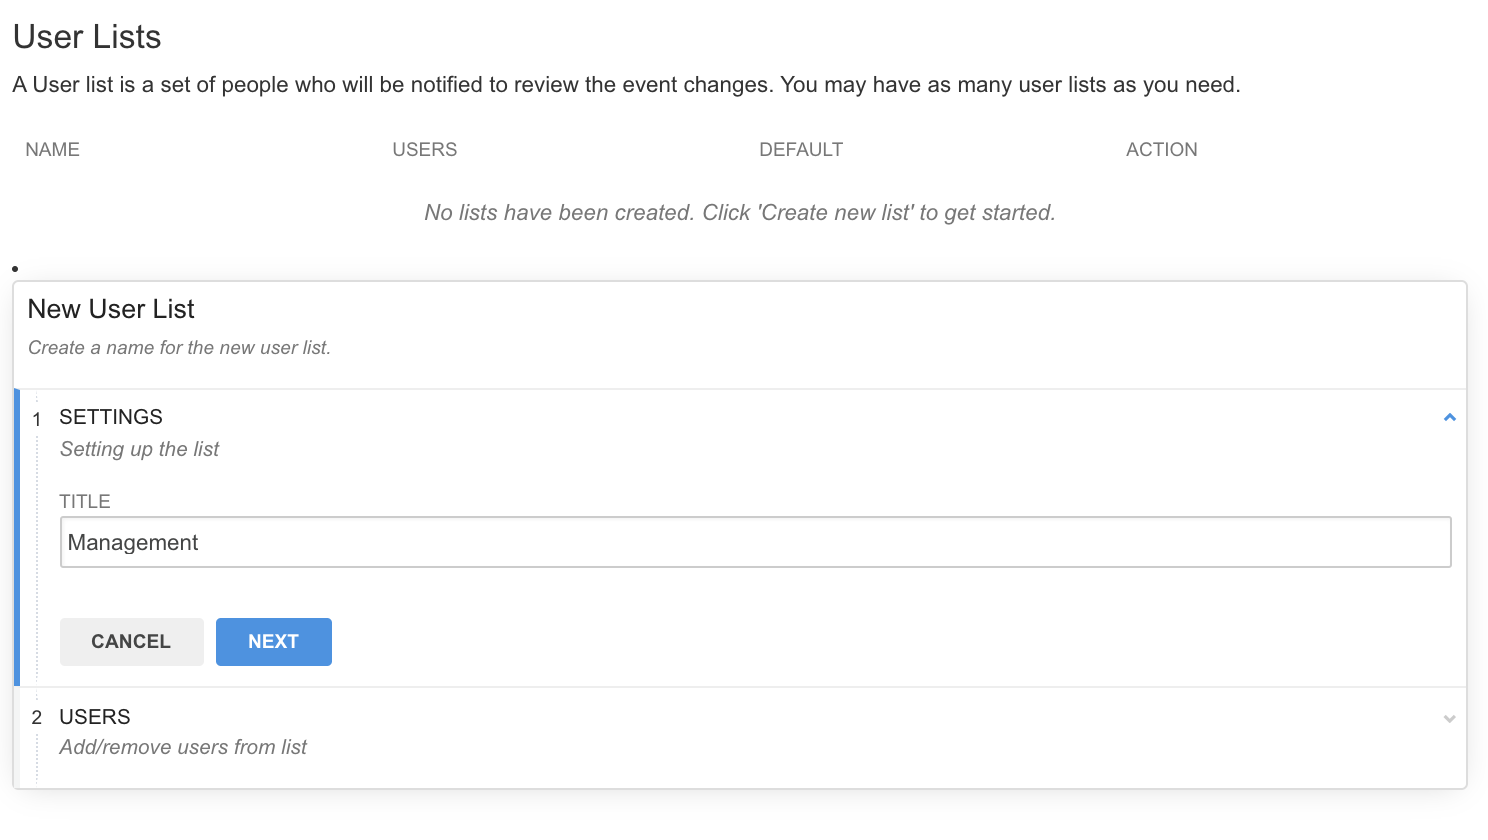
- Record the users you'd like to be Approvers under User Lists. To start, click Create new list
- Enter a Title for the Approver List, then click Next
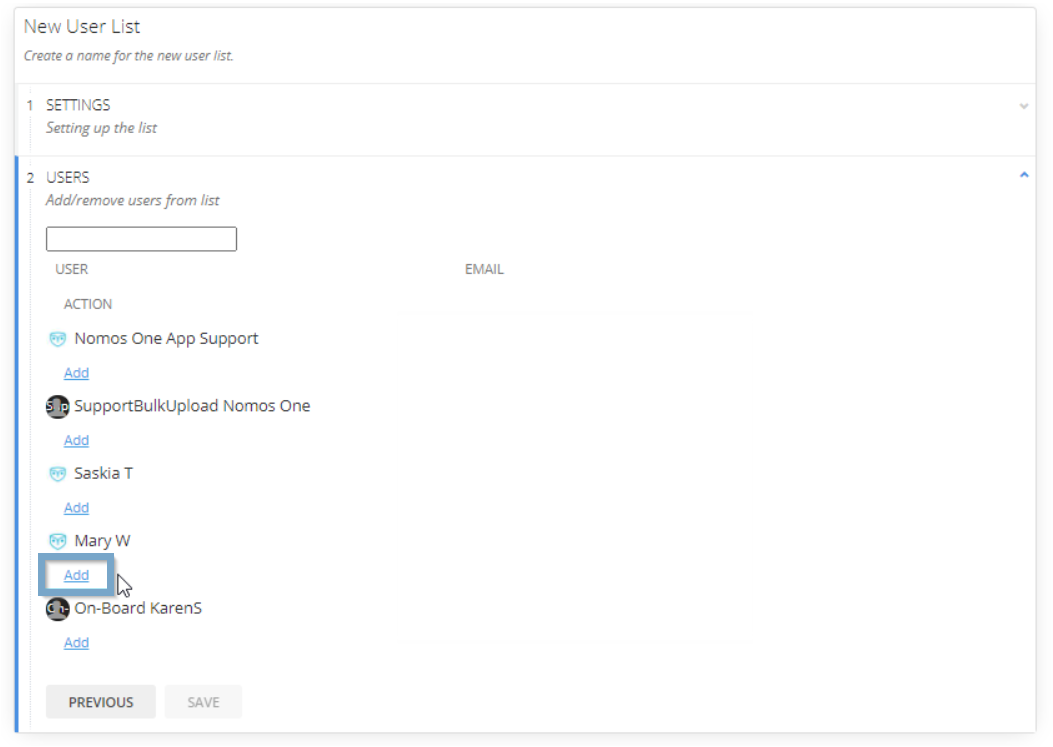
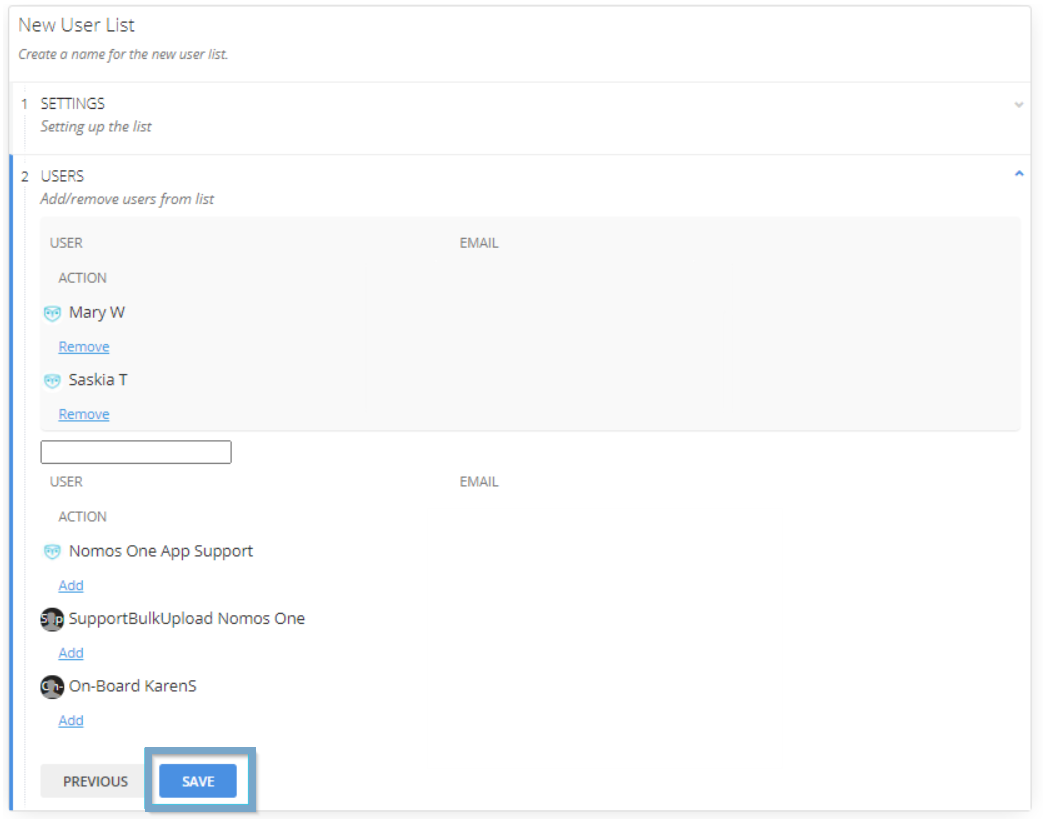
- Select which users you want to make an approver. Click Add under each User you would like to make an Approver in this list
Please Note: Once you've created a User List, we don't recommend editing the List. If you need to edit an existing list to add and/or remove an Approver from it, we recommend creating a new list.
- Once you've added all the Approvers you want in this list, Click Save
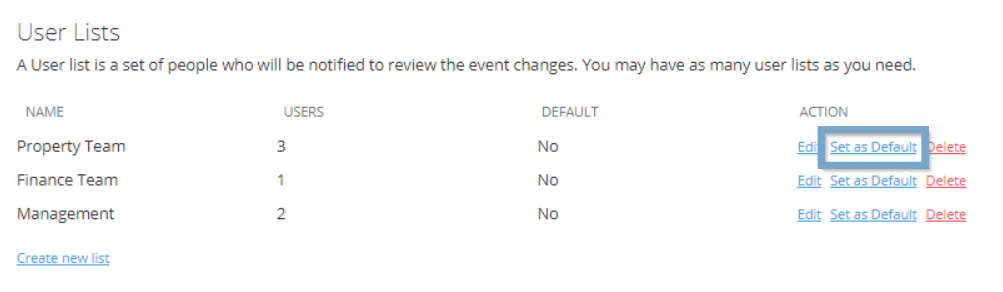
- If you have multiple User Lists created in your Organisation, you can select which one you would like to be the default by clicking Set as Default
Your Event Approvals will now be active in your Organisation with any of the conditions you've configured - well done!
If you've configured a Default Approval List but have multiple User Lists set up in your Organisation, you can change the List to be applied to individual Agreements in your Organisation by:
- Navigating to an Agreement subject to the Approval process
- Clicking Action > Repair Data
- On the Settings page, scrolling to the Event Approvals Section
- Using the drop down bar to select an alternate Approval List
- Clicking Done at the top of the Agreement Wizard to Save this change

Turning on Event Approvals only for specific Agreements
When configuring Event Approvals in your Organisation, enabling Event Approvals on individual Agreements allows you to turn on the Event Approval process for selected Agreements only (i.e. not for every Agreement in the Organisation by default). If you've selected this condition for your Event Approvals, there are a few extra steps you'll need to take to get Event Approvals working on the Agreements you want.
To complete this set up, you'll need to:
- Navigate to the Agreement you want Event Approvals enabled on
- In the Agreement Header, click Action > Repair Data
- On the Settings page, scroll to the Event Approvals section, and toggle this read Yes
- Select from the drop down bar the Approval List you want to apply to this Agreement
- Click Done at the top of the Agreement Wizard to save your change
You can repeat these steps for each Agreement you want Event Approvals enabled on.
How to Complete Events with Approvals on
Once Event Approvals have been enabled on an Agreement, you'll be required to acknowledge this at step 3 of the Event Completion process. If you're an on-boarder without approval privileges, you'll need to wait for approval from the designated person/people before you can proceed with uploading Documentation or completing an Event
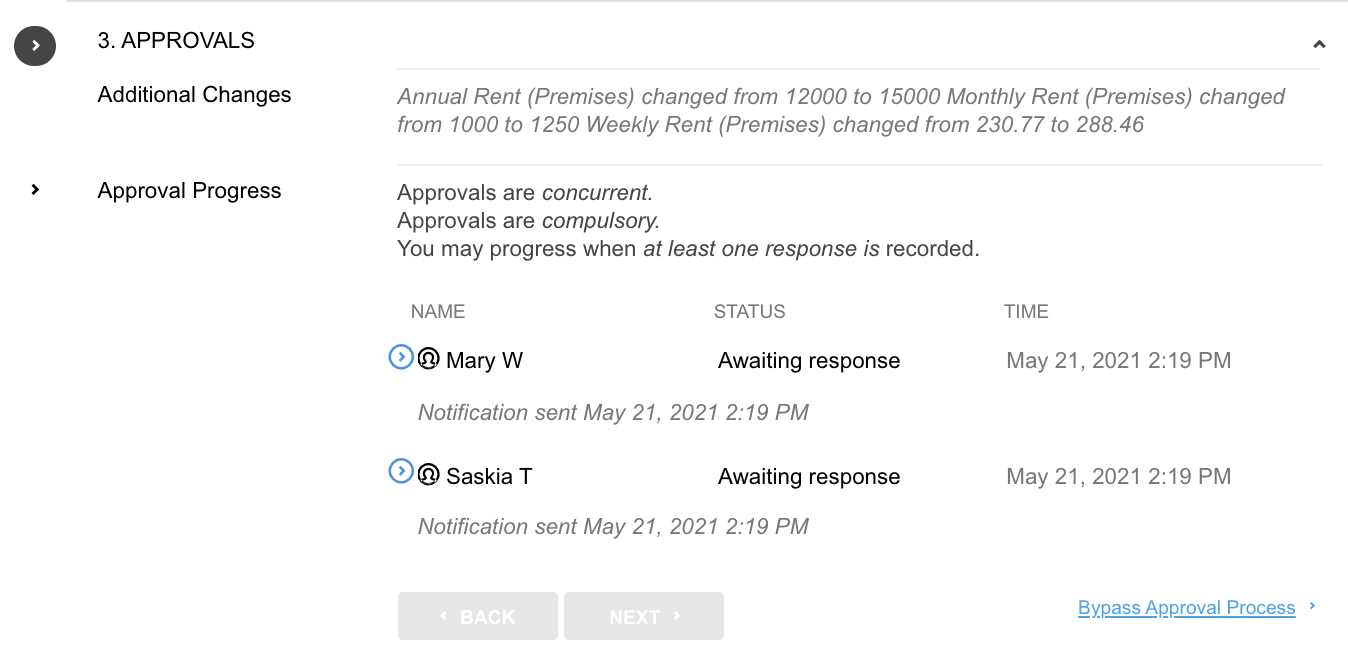
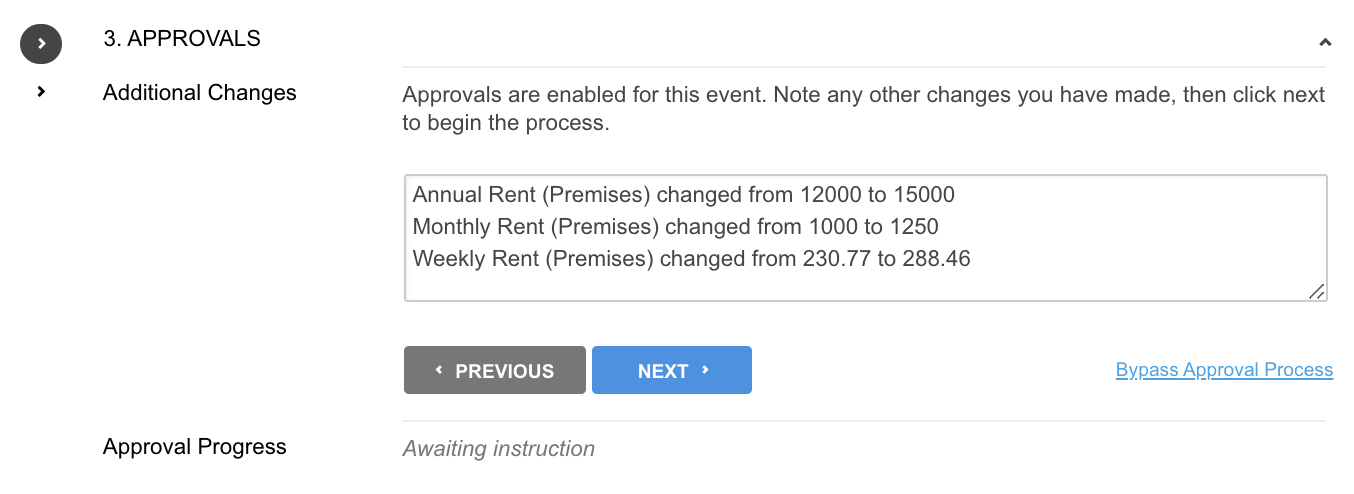
- Where an Agreement is subject to the Approval process, when you reach step 3 of the Event Completion process, as an on-boarder you'll see a summary of the changes you've made on the Event and have the option to add a note regarding additional changes that may not produce a note within the system. Once complete, click Next to trigger the Approval process
- This will automatically trigger an Event Approval email to be sent to your selected Approvers. Users will be able to return to the Event at any time and check the status of the approval

- All Approvers will receive an email requesting their response and detailing the changes that were made on an Event. If you're an Approver, click the Respond button in your email to automatically open the Sign In page and then sign in
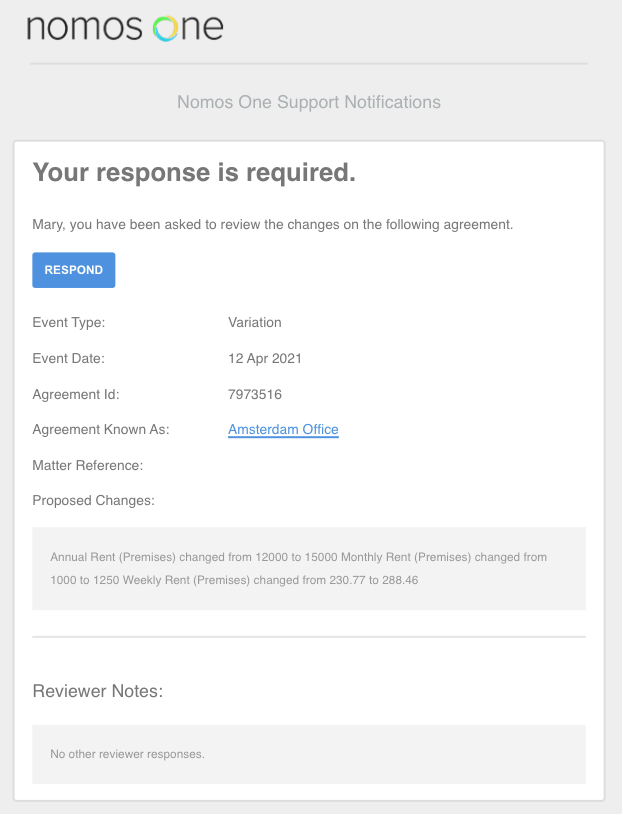
- Once signed in you'll be automatically directed to the Agreement and Event that requires approval

- As an Approver, you must choose from the following three options on the Event:

| Approve | Select Approve if you're happy with the changes made by the on-boarder. This will allow the on-boarder to progress with the Event completion process. |
| Conditional Approve | Select Conditional Approve if you're happy with the changes made by the on-boarder but require some other element to be entered or removed i.e. you may approve on the condition that the executed Variation document is uploaded confirming the changes. |
| Deny | Select Deny if you're not happy with the changes made. The on-boarder will not be able to progress with the Event completion process. |
You can also add a custom note or messages in the Your Notes section when you're recording your decision which everyone in your Organisation will be able to see.
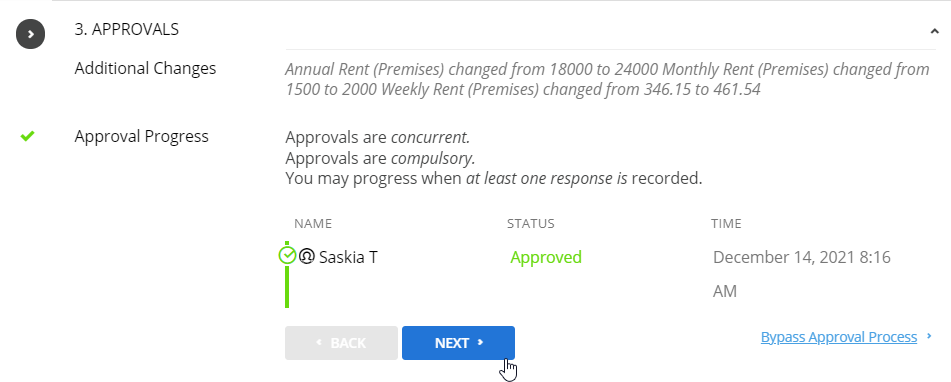
- As long as all required Approvers have approved the change to the Event, click Next
If the Approver has conditionally approved or denied the Approval, select step 2 and make the required changes before resubmitting it for approval.
- Complete your Event as usual by adding documents and clicking Complete!
Bypassing the Approval Process
On any Event with the Approval process activated, users can Bypass (i.e., skip) the approval process and requirements. This feature is available for situations where you might be making historical changes to an Agreement, or where you've decided as a company in line with your internal policies that an approval process is not required for a selected Agreement or action.
To bypass the Approval process on an Event:
- At the Approval step, click Bypass Approval Process
- Leave a note explaining why you've bypassed the approval requirement
- Click Bypass
- Finish completing your Event
Even though an approval process may have been bypassed, you'll always have oversight of the contractual changes made to your Agreement through the activity log on the side of the completed event, and also through the Activity Report.
Nomos One does not provide or purport to provide any accounting, financial, tax, legal or any professional advice, nor does Nomos One purport to offer a financial product or service. Nomos One is not responsible or liable for any claim, loss, damage, costs or expenses resulting from your use of or reliance on these resource materials. It is your responsibility to obtain accounting, financial, legal and taxation advice to ensure your use of the Nomos One system meets your individual requirements.